
No Bake Christmas Red Velvet Cheesecake

Ready for a holiday dessert that’s fun, festive, and so easy that you don’t even have to turn the oven on? Good, me too. Today we’re making a no-bake Christmas red velvet cheesecake, and this one’s perfect for everything from casual holiday gatherings when you want to impress, through to serving up on the big day itself. It looks amazing and it tastes even better!
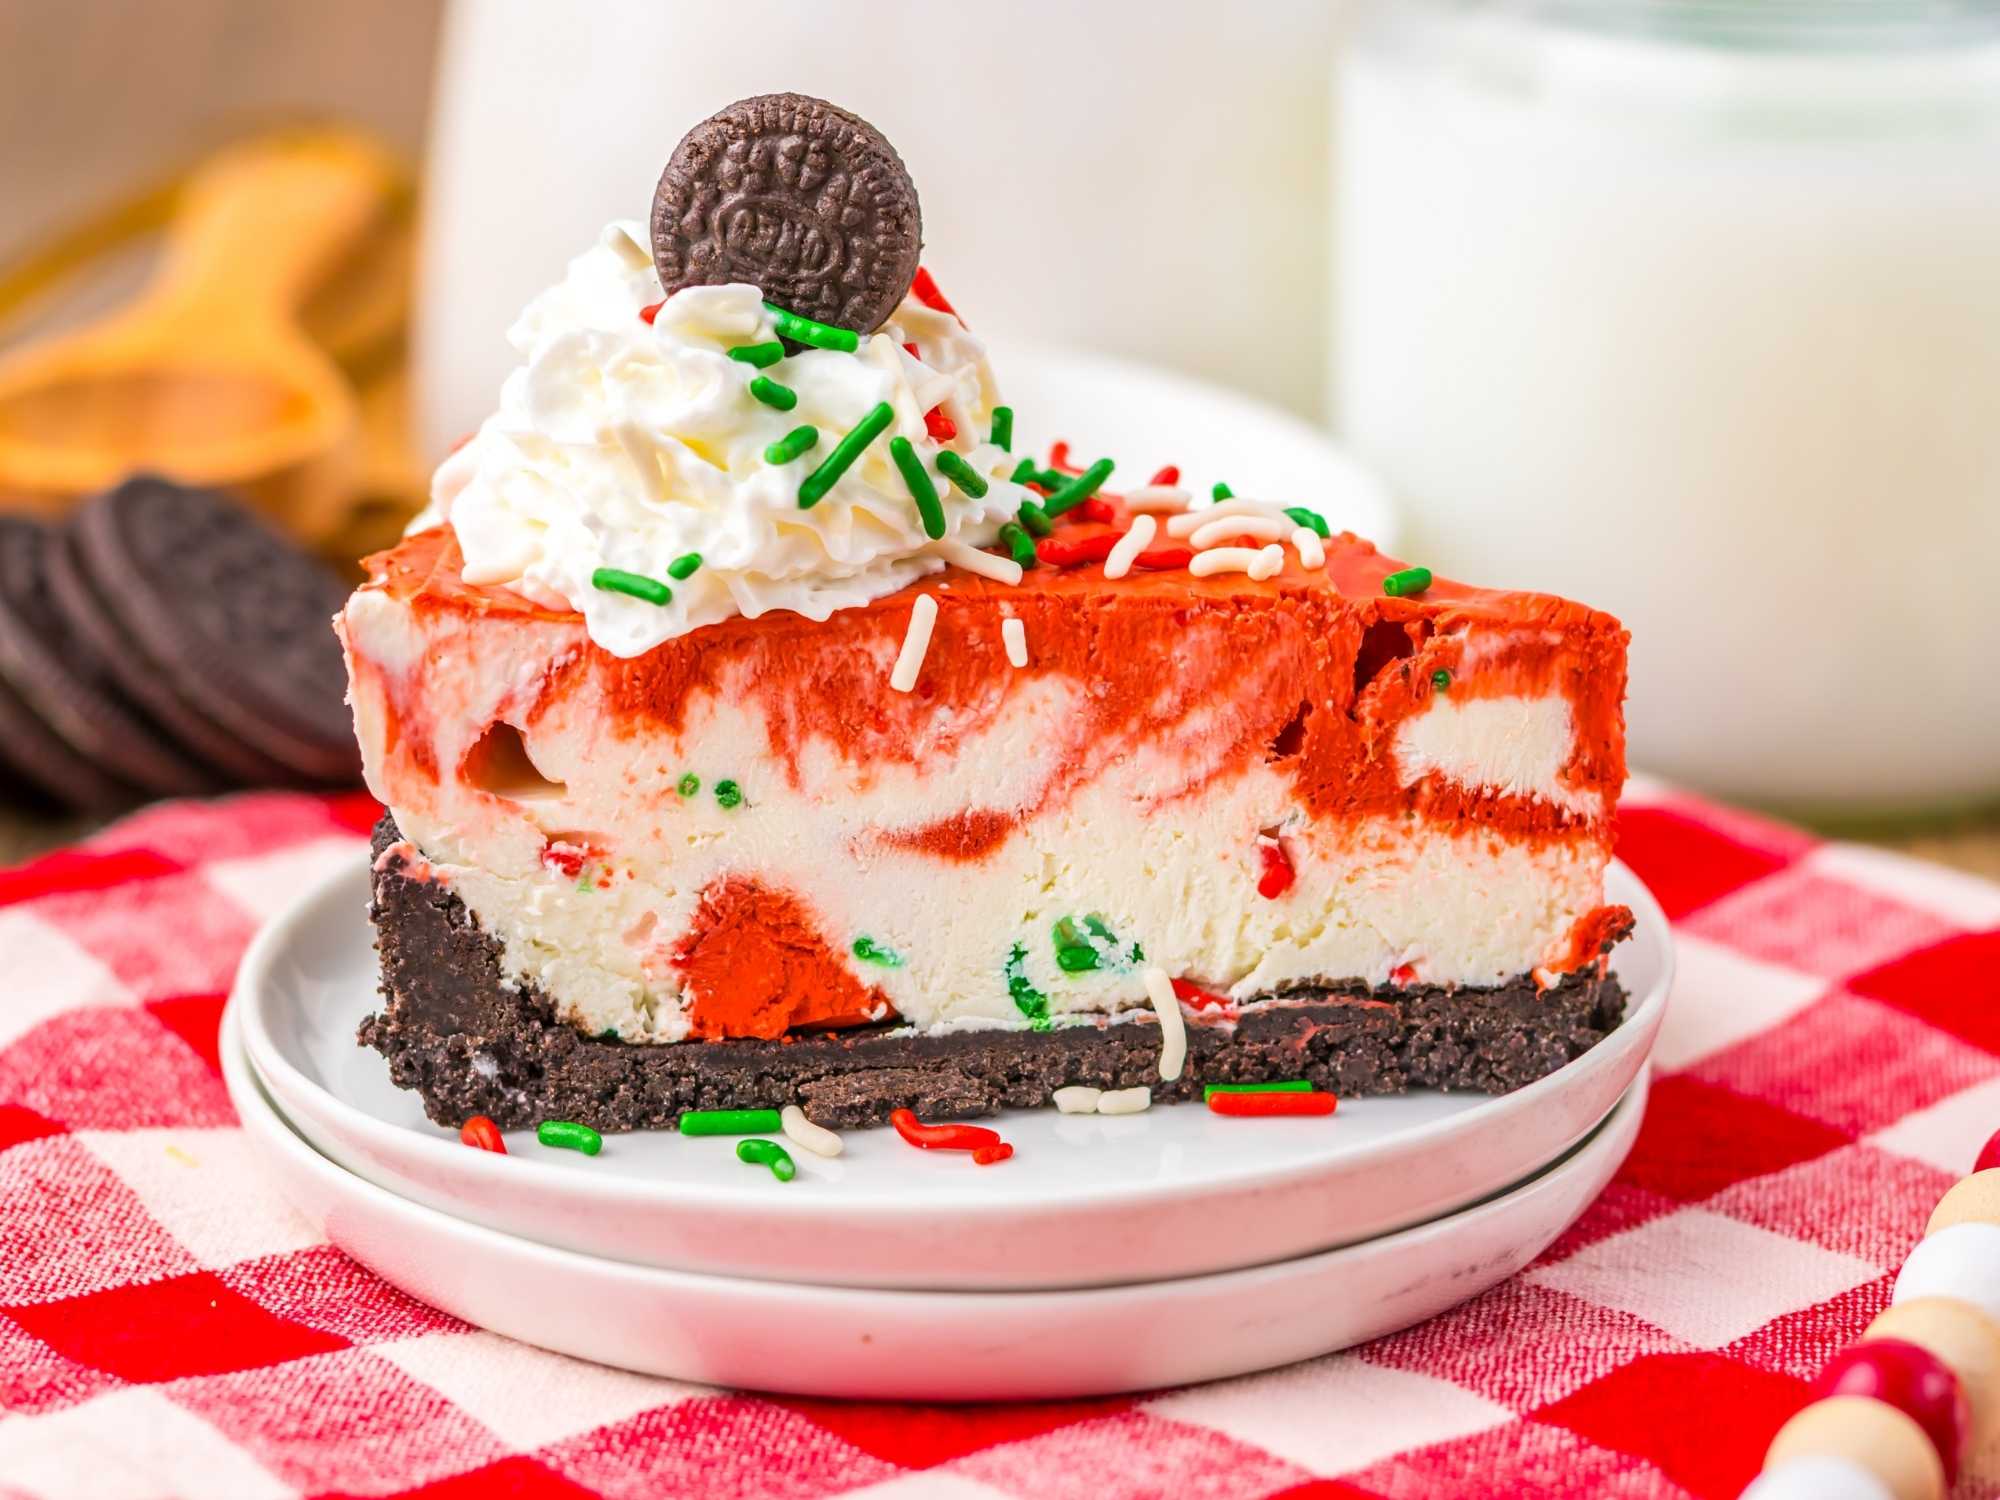
It starts with a rich Oreo cookie crust, layered with swirls of fluffy red velvet and classic vanilla cheesecake filling. Each slice is marbled with color, studded with festive sprinkles, and topped with clouds of whipped cream, mini Oreos, and a little sparkle of holiday cheer. Let’s make it together!
If you love a no-bake cheesecake, I think you’ll also enjoy my Biscoff cheesecake, peppermint Oreo cheesecake, and peppermint hot chocolate cheesecake!

Ingredients
Ready to make some holiday magic? You’ll find a printable recipe card with all the details at the bottom of this post. Save it to your Christmas dessert folder or print a copy to keep in your recipe box, so you can easily find it the next time you want to make it!
For the Crust:
-
Oreo cookies – Use the whole cookie, filling and all. It helps bind the crust and gives it that deep, chocolatey flavor that pairs perfectly with red velvet.
-
Butter (melted) – Holds everything together and adds that rich, buttery crunch when the crust sets.
For the Filling:
-
Cream cheese (softened) – The star of the show. Make sure it’s room temperature so it blends smoothly without lumps.
-
White sugar – Sweetens the cheesecake while keeping it light.
-
Heavy whipping cream – Whipped separately, it gives the cheesecake that airy, no-bake texture we all love.
-
Vanilla extract – Balances the tang of the cream cheese and rounds out the flavor.
-
Cocoa powder – Just enough to bring that signature red velvet flavor and a touch of chocolate richness.
-
Red food coloring – Adjust as needed to get your perfect red velvet hue — deep, bright, or somewhere in between.
-
Christmas sprinkles – Folded into the white batter for a festive pop of color and a little crunch in every bite.
For Topping:
-
Whipped cream – Soft, fluffy, and the perfect finishing touch.
-
Mini Oreos – For extra crunch and a fun, playful look.
-
More Christmas sprinkles – Because there’s no such thing as too many sprinkles during the holidays.

How To Make No Bake Red Velvet Cheesecake
- Make the crust: Add the Oreo cookies (cream and all!) to a food processor and pulse until you’ve got fine crumbs. Stir the crumbs together with melted butter until evenly coated, then press the mixture firmly into the bottom of an 8–9-inch springform pan. Pop it in the fridge while you work on the filling.

- Whip the cream: In a large chilled mixing bowl, beat the heavy cream until stiff peaks form. Set it aside — this is what gives your cheesecake that light, mousse-like texture.
- Mix the cheesecake base: In another bowl, beat the softened cream cheese and sugar until smooth and creamy. Add the vanilla and mix again until it’s all silky. Gently fold the whipped cream into the cream cheese mixture until fluffy and well combined.
- Create the colors: Split the cheesecake mixture evenly into two bowls. In one bowl, mix in cocoa powder and red food coloring until it reaches your perfect red velvet shade. In the other, gently fold in the Christmas sprinkles for a festive pop.

- Assemble the cheesecake: Grab your chilled crust and start alternating spoonfuls of the red velvet and sprinkle-filled batters. Use a butter knife or skewer to gently swirl the colors together for that pretty marbled look.
- Chill: Cover the pan and refrigerate for at least 4 hours (overnight is even better) until the cheesecake is firm and set.
- Decorate and serve: Just before serving, top with whipped cream, mini Oreos, and a flurry of Christmas sprinkles. Slice, serve, and get ready for the compliments.

Storage & Make-Ahead Tips
-
Fridge: Store your cheesecake covered in the refrigerator for up to 4 days. It stays creamy and sliceable, making it perfect for prepping ahead of parties.
-
Freezer: You can freeze it (without the toppings) for up to 2 months. Just thaw it overnight in the fridge before serving, then add your whipped cream and sprinkles fresh.
-
Make ahead: This cheesecake is a dream for busy holiday schedules — it actually tastes even better the next day after it’s had time to fully set.
Variations
Once you’ve made this dreamy red velvet cheesecake, it’s easy to switch things up for different flavors and occasions:
-
Peppermint Red Velvet Cheesecake: Add crushed candy canes to the white layer for a little minty crunch — it’s festive, refreshing, and looks so pretty in each slice.
-
Red Velvet Oreo Bars: Press the filling into a square pan instead of a springform and cut into bite-sized bars. Perfect for dessert trays, cookie exchanges, or gifting.
-
Layered Cheesecake Cups: Make it party-friendly by layering Oreo crumbs and swirled cheesecake in clear cups — no slicing needed, and everyone gets their own.
-
Chocolate Ganache Topping: Drizzle melted chocolate over the top before chilling for an extra-decadent touch (because there’s no such thing as too much chocolate).

Substitutions
This cheesecake is super adaptable, so you can easily make it work with what you have on hand (or switch things up for other holidays!):
-
Oreo crust: Try chocolate graham crackers or gingersnaps for a slightly different but still delicious base.
-
Heavy cream: Use Cool Whip as a shortcut — about 4 cups thawed will do the trick.
-
Vanilla extract: Swap for peppermint or almond extract for a fun holiday twist.
-
Christmas sprinkles: Change the colors for any occasion — think pink and red for Valentine’s Day or rainbow for birthdays.
-
Mini Oreos: Crushed Oreos, white chocolate curls, or even crushed candy canes make great toppings.
Serving Ideas
This no-bake red velvet cheesecake is a total showstopper on its own, but a few extra touches make it party-perfect:
-
Holiday presentation: Serve it on a white or gold cake stand and sprinkle a few extra sprinkles or crushed candy canes around the base for an easy, festive look.
-
Individual slices: Add a dollop of whipped cream and a mini Oreo on each slice right before serving — it makes every piece feel special.
-
Dessert board style: Slice it into small wedges and serve alongside chocolate truffles, sugar cookies, and peppermint bark for a Christmas dessert spread.
-
Pair it with: A mug of hot cocoa, coffee, or even a glass of Baileys for the grown-ups — the flavors all play so nicely together.
-
For gifting: Make mini versions in small jars or cupcake liners — adorable, portable, and guaranteed to impress.

No Bake Christmas Red Velvet Cheesecake
Ingredients
For the crust:
- 24 Oreo cookies about 2 cups crumbs
- ⅓ cup butter melted
For the filling:
- 4 8-ounce blocks cream cheese, softened to room temperature
- ½ cup white sugar
- 2 cups heavy whipping cream
- 1 teaspoon vanilla extract
- 2 tablespoons cocoa powder
- Red food coloring as needed for desired shade
- ¼ cup Christmas sprinkles for the white batter
For topping:
- Whipped cream
- Mini Oreos
- Extra Christmas sprinkles
Instructions
- Make the crust: Add the Oreo cookies (cream and all!) to a food processor and pulse until you’ve got fine crumbs. Stir the crumbs together with melted butter until evenly coated, then press the mixture firmly into the bottom of an 8–9-inch springform pan. Pop it in the fridge while you work on the filling.
- Whip the cream: In a large chilled mixing bowl, beat the heavy cream until stiff peaks form. Set it aside — this is what gives your cheesecake that light, mousse-like texture.
- Mix the cheesecake base: In another bowl, beat the softened cream cheese and sugar until smooth and creamy. Add the vanilla and mix again until it’s all silky. Gently fold the whipped cream into the cream cheese mixture until fluffy and well combined.
- Create the colors: Split the cheesecake mixture evenly into two bowls. In one bowl, mix in cocoa powder and red food coloring until it reaches your perfect red velvet shade. In the other, gently fold in the Christmas sprinkles for a festive pop.
- Assemble the cheesecake: Grab your chilled crust and start alternating spoonfuls of the red velvet and sprinkle-filled batters. Use a butter knife or skewer to gently swirl the colors together for that pretty marbled look.
- Chill: Cover the pan and refrigerate for at least 4 hours (overnight is even better) until the cheesecake is firm and set.
- Decorate and serve: Just before serving, top with whipped cream, mini Oreos, and a flurry of Christmas sprinkles. Slice, serve, and get ready for the compliments.
This red velvet cheesecake is everything I love in a holiday dessert — easy to make, absolutely gorgeous, and guaranteed to get people talking! It’s rich, creamy, and festive without ever touching the oven, which makes it perfect for those busy December days when the kitchen is already working overtime. Whether you serve it at a Christmas party, take it to a cookie exchange, or keep it in the fridge “just because,” it’s one of those desserts that never fails to impress! If you make it, I’d love to hear your thoughts in the comments below.
